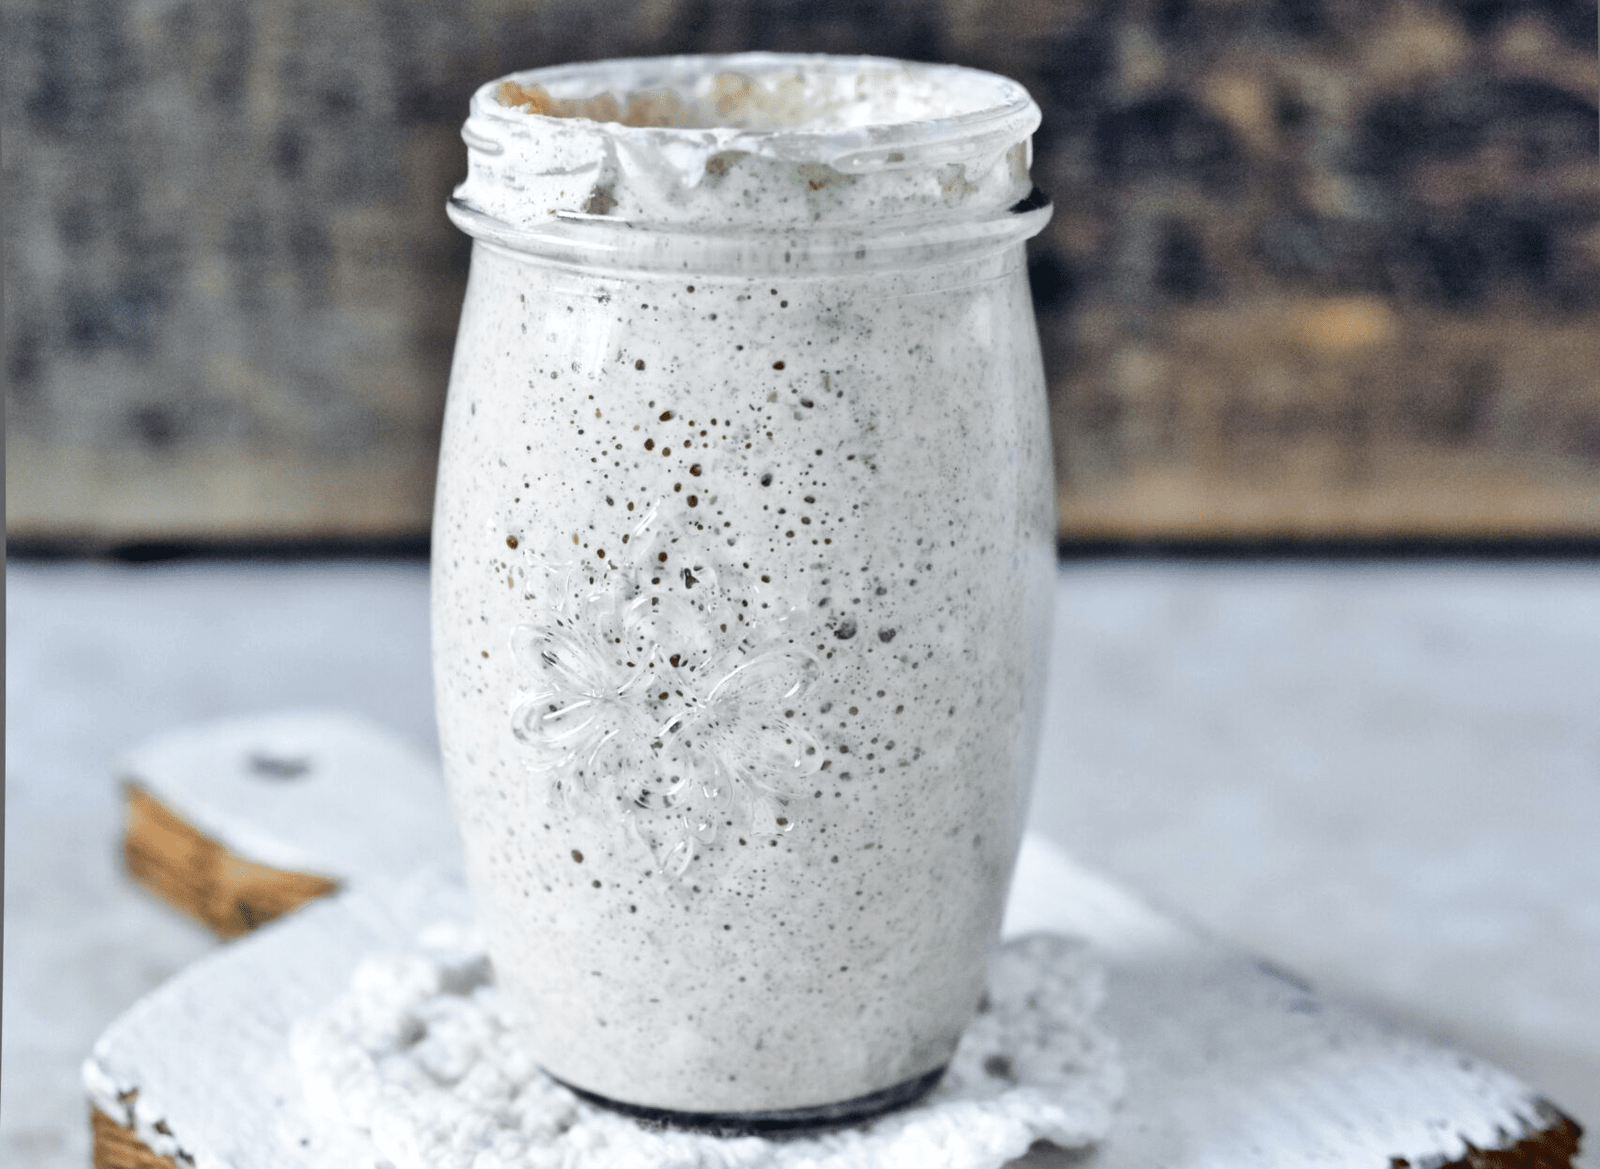
Activate Your Sourdough Starter:
Before we begin, make sure you have a thriving sourdough starter. If you don’t have a starter yet, I have a separate guide linked below on creating your very own from scratch. A well-fed starter is going to be the heart and soul of your sourdough bread. For my sourdough bread recipe I prepare my starter at 100% hydration (for info on hydration levels in bread, click here)

Why Choose Sourdough?
Sourdough bread has surged in popularity in recent years, and it’s easy to see why. Its rich, tangy flavor, chewy texture, and health benefits set it apart from typical store-bought loaves. But there’s more to sourdough than just taste. Unlike commercial bread, which relies on quick yeast fermentation, sourdough is naturally leavened, using wild yeast and bacteria for fermentation. This process not only enhances its flavor but also makes it easier to digest and potentially offers some great benefits for your gut health. Plus, making sourdough bread is a more sustainable choice, requiring fewer resources and generating less waste.
The Science of Sourdough
Fermentation
The magic behind sourdough bread lies in its fermentation process. Sourdough begins with a starter—essentially a living culture made of flour and water that’s home to wild yeast and lactic acid bacteria. These microorganisms slowly ferment the dough, creating gases that cause it to rise, while developing the deep, complex flavors sourdough is known for. This natural fermentation also contributes to the bread’s chewy texture and its slightly tangy taste.
Health Benefits
While sourdough is delicious, it also offers a range of health benefits that make it a more attractive option than commercial bread. Here are a few reasons to make the switch:
- Digestibility: The fermentation process breaks down some of the gluten and phytic acid in the dough, which can make sourdough easier to digest for some people, especially those with mild gluten sensitivities.
- Nutrient Absorption: The lactic acid bacteria in the sourdough starter can increase the bioavailability of certain nutrients in the flour, including B vitamins and minerals like calcium and magnesium. This means that your body can absorb these nutrients more efficiently.
- Lower Glycemic Index: Compared to commercial yeast bread, sourdough typically has a lower glycemic index. This means that it leads to a slower, more gradual increase in blood sugar levels, which can help maintain energy levels throughout the day.
Ingredients
Making sourdough bread requires just a few simple ingredients, but choosing the right ones can elevate the flavor and texture. Here’s what you’ll need:
- Flour: The flour you choose plays a huge role in the outcome of your bread. Bread flour is the best option due to its high protein content, which helps develop gluten for a better rise and texture. However, feel free to experiment with other flours like whole wheat, rye, or spelt for different flavors and textures.
- Salt: The type of salt used can impact the flavor. Fine sea salt is often the best choice, as it dissolves evenly in the dough. I’ve made the mistake before of adding coarse salt which lead to bland bread with crunchy chunks of salt.. we don’t want that!
- Sourdough Starter: A healthy starter is the key to great sourdough. You can either whip up your own starter from scratch (which is a fun and rewarding process) or purchase an active starter online or from a friend.

Homemade Sourdough Bread
Ingredients
- 100 g Active sourdough starter
- 340 ml Room temp water
- 500 g Bread flour
- 16 g Fine sea salt
Instructions
- Before you begin, ensure you have a thriving sourdough starter: a well-fed starter is the heart and soul of your sourdough bread.
PREP THE DOUGH
- Combine the bread flour, water, and your active sourdough starter. Mix the ingredients until they form a shaggy dough. Cover the bowl with a damp cloth and let it rest for 30mins, allowing the flour to fully hydrate/autolyse.
- Sprinkle the fine sea salt evenly over the dough. Gently fold in the dough from the corners until the salt is fully incorporated. Recover the bowl with a damp cloth .
- After 30mins, repeat that series of stretching the dough from the corners and folding it in on itself. These folds will help strengthen the gluten in the dough.
- After another 30 mins, repeat your final series of stretch and folds. You'll notice after each 30 minute return that your dough is becoming more elastic/springy.
FERMENTATION
- It’s time to let the magic of fermentation happen. Cover the bowl again and let the dough rest for about 4-6 hours, or until the dough has doubled in size, at room temperature.
- Transfer the dough onto a lightly floured surface. Gently shape it into a round loaf, being mindful not to overwork the dough. Place the shaped dough in a proofing basket (or any medium sized bowl) seam-side up.
- Place your dough in the fridge overnight (or for around 8-10 hours)
- Remove your dough from the fridge and allow it to undergo its second rise. This process typically takes 1-2 hours at room temperature. You’ll know the dough is ready when it has increased in volume and feels slightly puffy to the touch.
BAKE YOUR BREAD
- While your dough is undergoing its second rise, preheat your oven to 240°C (465°F) and place a Dutch oven or a covered baking dish inside to pre-heat for 40mins.
- Gently invert the proofed dough onto a piece of parchment paper. Score the top with a sharp knife or a bread lame to allow for controlled expansion during baking (This is your opportunity to create a pretty pattern). Carefully transfer the parchment paper with the dough into the hot Dutch oven.
- Cover the Dutch oven with its lid and place it back in the oven. Bake the bread for 50 minutes covered and 10 mins uncovered.
- Once your sourdough bread is baked to perfection, remove it from the oven and let it cool on a wire rack. The anticipation will be tempting, but allow the bread to cool completely before slicing.
- Finally.. ENJOY, savor the rewarding taste and aroma of your homemade sourdough bread with a dollop of creamy salted butter (homemade butter recipe linked below!), knowing you’ve crafted it with love and care.
Troubleshooting and Common Mistakes
Baking sourdough can be an art, and sometimes things don’t go as planned. If you’re encountering issues with your loaves, don’t worry! Here’s a list of common problems, their potential causes, and practical solutions to help you troubleshoot your sourdough with confidence.
Flat Loaves
- Possible Causes: Insufficient gluten development, overproofing, or weak starter.
- Solutions: Ensuring proper kneading is key to developing the gluten structure. You may need to knead your dough a little longer or try the “stretch and fold” method. Watch your proofing times carefully—overproofed dough will collapse, while underproofed dough may not rise enough. I’ve had many a flat loaf thanks to my impatient bread cravings! Additionally, make sure your starter is strong and active by feeding it regularly with fresh flour and water.
Dense Crumb
- Possible Causes: Underproofing or inadequate hydration.
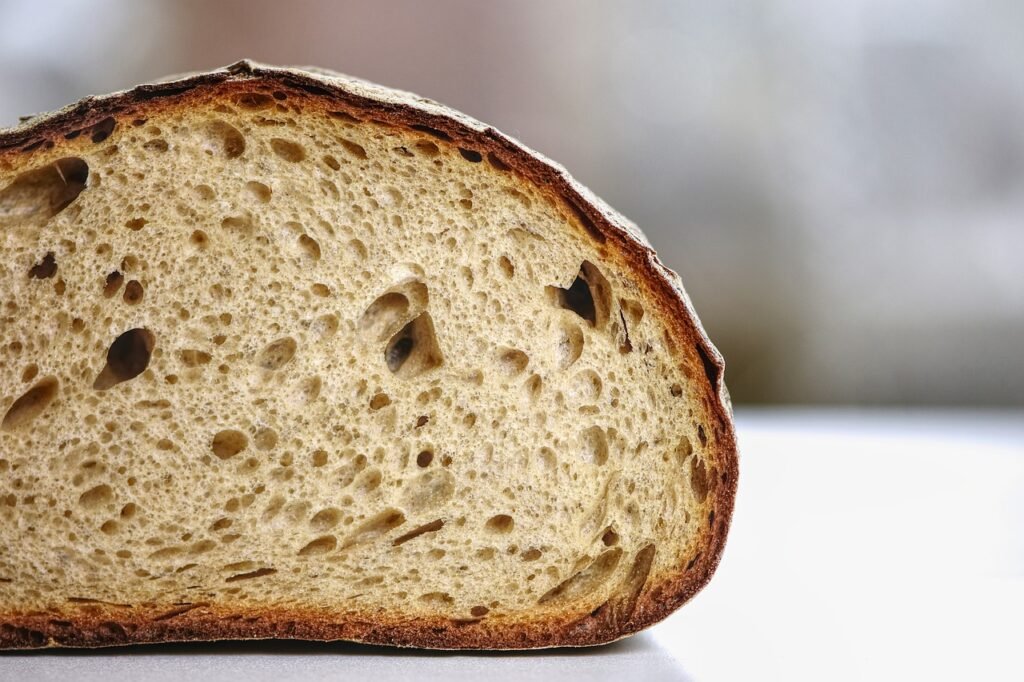
- Solutions: A dense crumb often results from not allowing the dough to rise long enough. Give it the proper time to develop during the bulk fermentation stage. You can also adjust the hydration level by adding more water to achieve a more open crumb. Remember, wetter doughs can be trickier to handle but often result in lighter, airier loaves. If You’re struggling to manoeuvre it I find using one of these helps.
Sour Taste
- Possible Causes: Prolonged fermentation or high acidity in the starter.
- Solutions: While a slight tang is characteristic of sourdough, an overly sour taste can be a sign of over-fermentation. To reduce this, try shortening your fermentation times or adjusting the temperature at which your dough ferments. Additionally, feed your starter more frequently to prevent it from becoming too acidic.
Enhancing Your Sourdough Baking Skills
Once you’ve tackled the basics, it’s time to elevate your sourdough game! There are countless ways to experiment with flavor, texture, and even aesthetics. Here are some tips to take your baking to the next level.
Experiment with Flours
- Why It Works: Using a variety of flours such as whole wheat, rye, or spelt can completely transform your sourdough. Different flours absorb water in unique ways, affecting the texture and hydration of your dough. Rye and spelt flour, for instance, give your bread a richer flavor and a denser crumb.
- Pro Tip: Start with substituting 20-30% of your usual bread flour with a different type of flour. This will give you a taste of how the flour influences the final result without drastically changing your recipe.
Adjust Hydration Levels
- Why It Works: The hydration level (how much water is added to the flour) directly impacts the crumb texture and crust of your bread. Higher hydration doughs tend to create a more open crumb, with larger holes and a chewy texture.
- Pro Tip: Start experimenting with slightly wetter doughs. While high-hydration dough can be difficult to handle, it creates a much lighter and airier loaf. Consider using a bench scraper and practicing your shaping techniques to manage the dough’s stickiness.
Incorporate Add-ins
- Why It Works: Adding seeds, herbs, cheese, nuts, or dried fruits to your dough gives your bread an exciting new flavor profile. It’s a fun way to customize your loaves and make each batch unique.
- Pro Tip: For best results, gently fold in your add-ins during the final stretch and fold stages, just before shaping your dough. This prevents overworking the dough and ensures an even distribution of the ingredients.
Document Your Journey
- Why It Works: Keeping a baking diary can help you refine your techniques, track your progress, and ensure consistency in your loaves. You’ll be able to pinpoint what works well and what doesn’t for future bakes.
- Pro Tip: In your journal, note everything from hydration levels to room temperatures. Observing trends and patterns will help you troubleshoot and improve your process over time.
The Reward of Crafting Your Own Sourdough Bread
Making sourdough bread is much more than just baking—it’s a journey that connects you to tradition, patience, and craftsmanship. Each loaf is a personal achievement (and it’ll feel that way!), crafted with care, time, and a dash of creativity. Whether you’re just starting out or already have a few loaves under your belt, this guide will help you continue perfecting your skills and enjoying the process. The beauty of sourdough lies in the small tweaks, experiments, and learning opportunities that come with each bake.
Start Your Sourdough Journey Today!
Ready to make your first (or next) loaf of sourdough bread? Use this guide to get started, and don’t be afraid to experiment and make it your own. Let me know how your baking goes, share your experiences, and ask questions in the comments below. I’d love to hear how you’re crafting your perfect loaf!
Happy baking!


.